Inspired by Chet Haase's article on RenderNode, I wanted to create something that could make use of a blur effect. I decided on a button that could be used as a Day/Night toggle. It would be a relatively simple layout; a sun and moon peeking out from behind a cloud. The blur effect would be used to soften the portion of the sun and moon behind the cloud and give a more realistic impression of a atmospheric cloud.
Design
As is usually the case in my projects, the first step was Figma. I played around with some shapes and proportions and finally came up with a design I wanted to aim for.
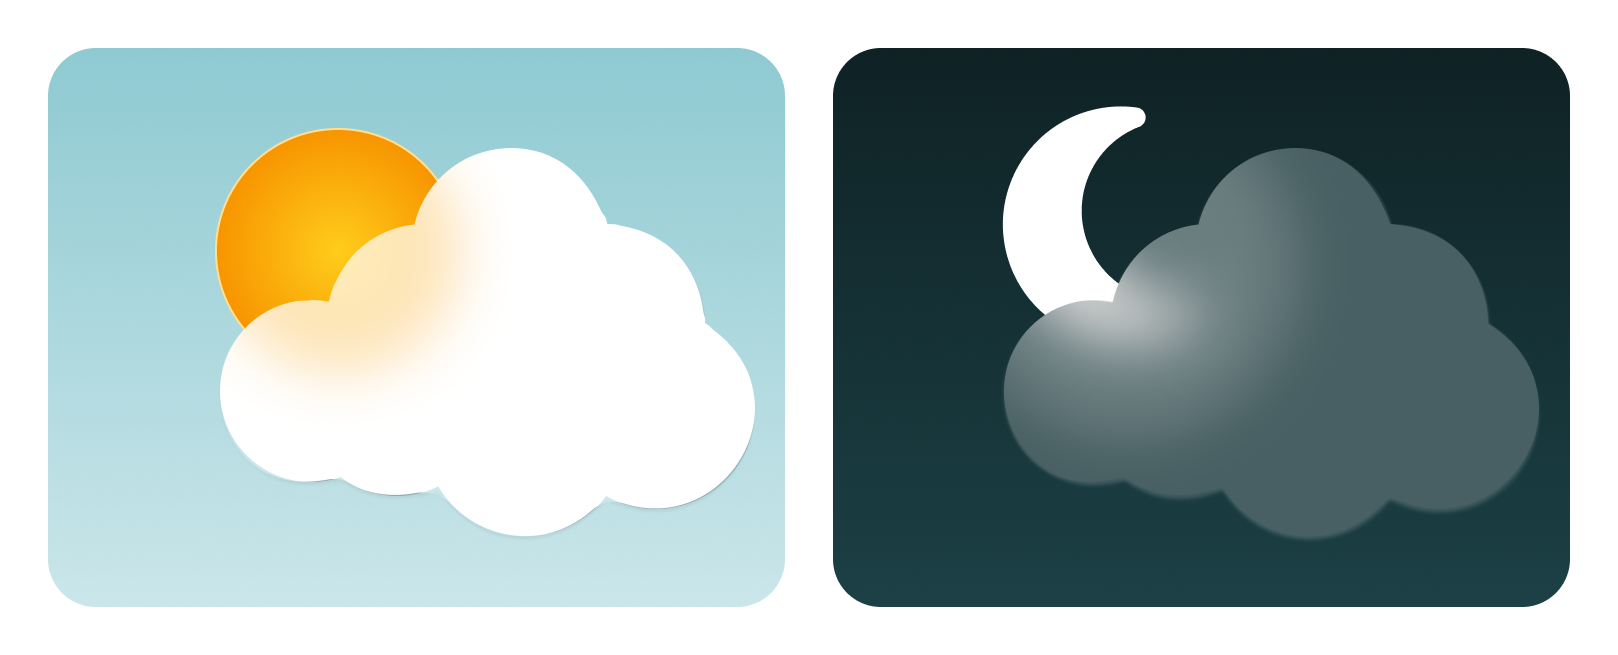
It was hard to keep things simple but it was necessary since the end-goal is a button-sized icon. If I were creating a larger piece though, I would love to add some birds to the day state and transform them into twinkling stars at night!
One design detail that might not be so obvious is the use of a halo around the moon. I added this because the moon alone felt underwhelming. The blur reduces the weight of the crescent so adding the halo makes the moon's glow more noticeable.
Assets
I separated the above into various vector components so that I could import them into Android Studio.
icon_cloud.svg
icon_sun.svg
icon_moon.svg
icon_halo.svg
Pro-tip: I placed each component within a frame in Figma and exported the frame. This makes alignment much easier on the dev side since the assets just need to be overlaid overtop of each other instead of messing around with custom positioning in code.
Also remember to check your xml when exporting from Figma! The files were pretty clean but there was a few unnecessary bits that I was able to remove.
Android Studio
The initial composable was quite simple since I had created the assets with the intended layout. All I needed was a Box with an Image for each asset, with the cloud asset at the top of the z-order.
Blur effect
How to get that blur effect though? I decided to try a new library by Chris Banes.
The first step in using the library is to create a HazeState in the composition
val hazeState = remember { HazeState() }
Next we add composables to that state using the hazeChild modifier to demarcate what should be blurred. In my case, I want the area underneath the cloud to be blurred so my Cloud composable looks like this:
Icon(
  painter = painterResource(id = R.drawable.icon_cloud_l),
  contentDescription = "A cloud",
  modifier = Modifier
    .fillMaxSize()
    .hazeChild(
      state = hazeState,
      shape = CloudShape(),
    ),
  ...
)
Icon composable for the Cloud
CloudShape extends androidx.compose.ui.graphics.Shape and is used to define an Outline. This outline is used for clipping. As far as I know, we can't simply use an svg asset to define a clipping path unfortunately.
One thing to note is that the implementation uses the path from the svg so you'll have to ensure that CloudShape gets updated any time the source svg changes.
Full credit goes to Abhinav Chauhan for his article detailing this process.
class CloudShape : Shape {
  @SuppressLint("RestrictedApi")
  override fun createOutline(
    size: Size,
    layoutDirection: LayoutDirection,
    density: Density
  ): Outline {
    val pathData = """M279.1,798.6C42,862.3 39.7,498.1 260.4,537.8C268.6,501.8 307.7,424.6 388.7,420.1C408.2,300.2 616.1,238.8 677.6,420.1C785.7,426.9 823.2,504.8 824.7,569.3C995.1,675.7 851,914 676.9,827.8C598.8,921.5 472.8,897.5 424.7,812.8C405.2,823.3 330.9,842.1 279.1,798.6Z"""
    val scaleX = size.width / 1000
    val scaleY = size.height / 1000
    return Outline.Generic(
      PathParser.createPathFromPathData(
        resize(pathData, scaleX, scaleY)
      ).asComposePath()
    )
  }

  private fun resize(pathData: String, scaleX: Float, scaleY: Float): String? {
    val matcher = Pattern.compile("[0-9]+[.]?([0-9]+)?").matcher(pathData) // match the numbers in the path
    val stringBuffer = StringBuffer()
    var count = 0
    while(matcher.find()){
      val number = matcher.group().toFloat()
      matcher.appendReplacement(stringBuffer,(if(count % 2 == 0) number * scaleX else number * scaleY).toString()) // replace numbers with scaled numbers
      ++count
    }
    return stringBuffer.toString() // return the scaled path
  }
}
Custom outline for clipping
Now that the hazing area is set, we just need to mark the composables we want to be blurred. To simplify things, I added all of the images to a single Box and marked that with the haze modifier:
Box(
  modifier = Modifier
    .fillMaxSize()
    .haze(
      state = hazeState,
      blurRadius = 4.dp,
      backgroundColor = tintCloud.value,
    ),
) {
  // Image composables here...
}
Haze modifier
This is about where I ran into a quirk of using the library. The Haze modifier has a backgroundColor parameter. I'm drawing a custom gradient for the sky so I figured I should use Color.Transparent but this was the result:
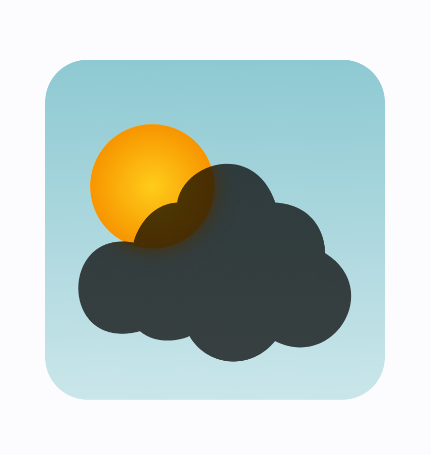
While the sun is indeed being blurred, it's not being blurred in the way we would expect and it's adding a gray cast to to the rest of the cloud. This issue is mentioned in the parameter comments for haze():
tint - Color to tint the blurred content. Should be translucent, otherwise you will not see the blurred content.
If not specified directly, the modifier uses the given backgroundColour.
I fixed this by setting the backgroundColor parameter to the colour of the cloud since it's the main colour I wanted to blend it with anyway.
Animation
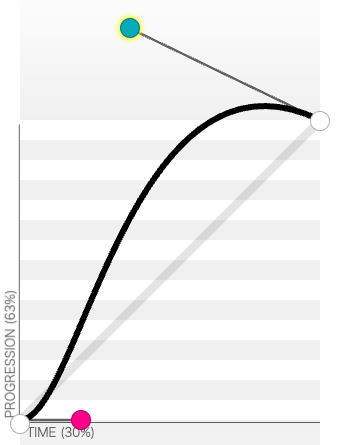
I created custom easing functions for the animations so that I could have full control over the motion of the transitions. I wanted to give a different character for the sun and moon transitions while ensuring that they could run simultaneously in a smooth way. cubic-bezier.com is an excellent resource for this. It lets you specify or drag control points and shows you the resulting curve. It makes it much easier to really dial in the motion.
I used this function for the sun motion:
It gives the sun a smooth acceleration and a tiny bit of overshoot. On the dev side, the implementation looks like this:
val translationSun = animateFloatAsState(
  targetValue = if (isLight) 0f else translationSunPx,
  label = "translate-sun",
  animationSpec = tween(500, 0, CubicBezierEasing(0.72f, 0f, 0.36f, 1.31f)),
)
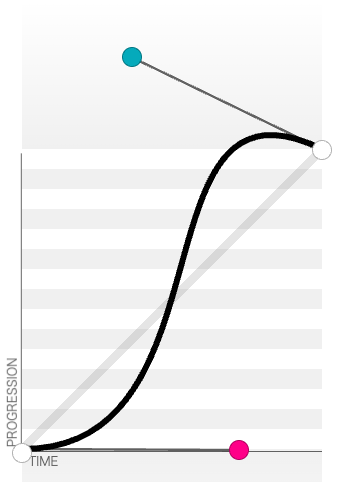
I wanted the moon to have a feeling of lethargy so I reduced the amount it would translate by and changed the animation to shift it into place more quickly. I also added a bit of rotation around the centre for a bit more motion.
The translation and rotations are implemented via the drawWithContent modifier. Compose is smart enough to realize that it can skip recomposition if the changed variable is only being used in the draw phase.
Image(
  painterResource(id = R.drawable.icon_sun_l),
  contentDescription = "Sun",
  modifier = Modifier
    .fillMaxSize()
    .alpha(alphaSun.value)
    .drawWithContent {
      translate(left = translationSun.value, top = translationSun.value) {
        this@drawWithContent.drawContent()
      }
    },
)
Use drawWithContent to reduce recompositions
The sky background is handled similarly:
Box(
  modifier = Modifier
    ...
    .drawBehind {
      drawRect(
        brush = Brush.linearGradient(
          colors = listOf(startColor.value, endColor.value),
          end = Offset(0f, Float.POSITIVE_INFINITY)
        ))
    },
) { ... }
Use drawBehind to reduce recompositions
The final result!
Rendered at large size for convenience :)
The final animation
Hopefully this was useful, or at least interesting!