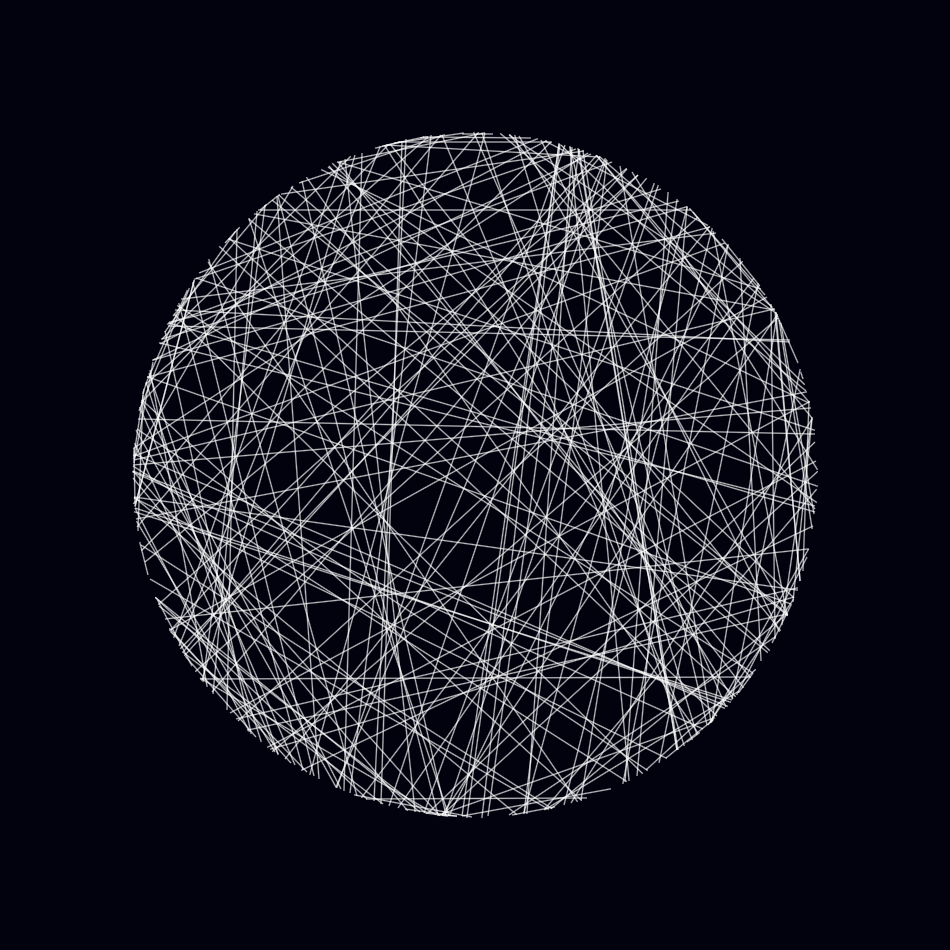
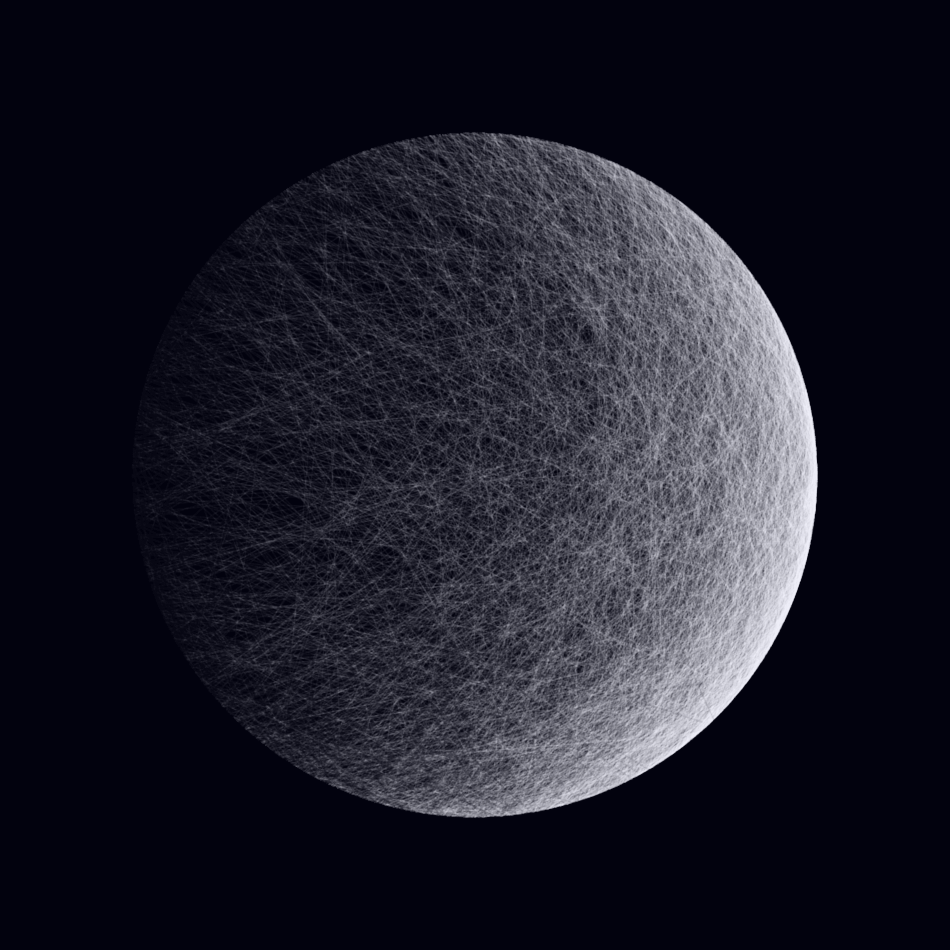
This article details a generative art project I completed recently. A project whose result I've tasked with the hero image on my little site here! The inspiration was an image I found online that looked like a sphere but was in fact a series of straight lines. It was a neat effect so it's been on my mind for a good while to implement for myself.
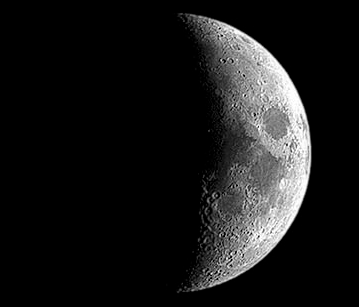
I looked over the various phases of the moon and the Waxing phase was the one that called out to me most strongly from a visual standpoint.
As a forewarning, this article will be very light on code. My goal is to highlight the iterative process that goes into creating a piece like this.
Background colour
First things first. What should the base colour for this piece be? I chose an inky black background (#020214) that felt like a deep space. Perhaps a deep red would have been more canonical?
Moon Surface
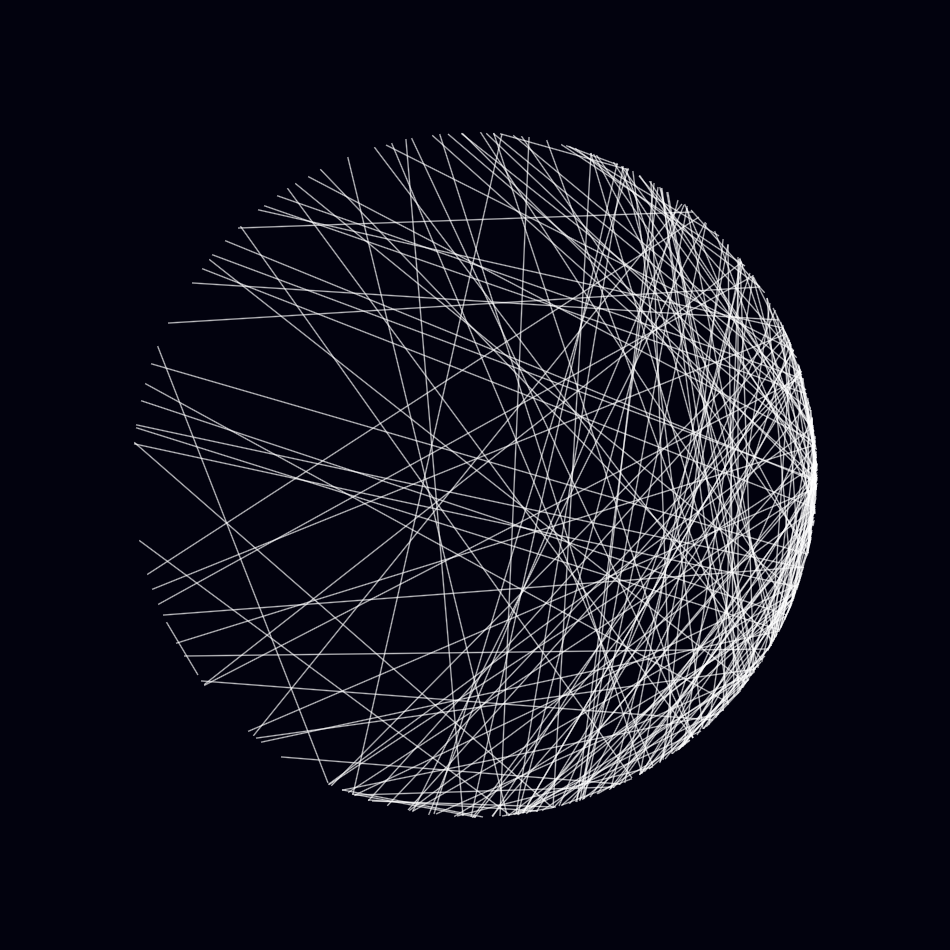
Drawing a moon with lines meant endpoints, lots of endpoints, so I wrote a quick prototype that would generate points at a random position on the circumference of a given circle.
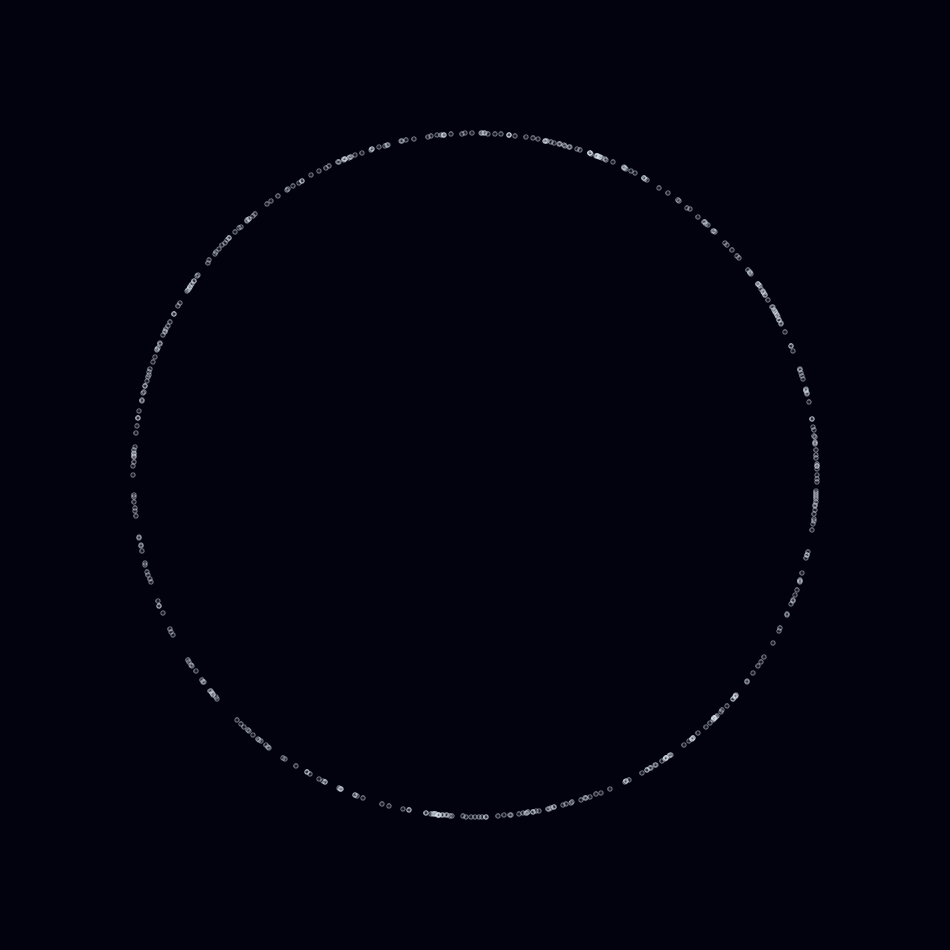
This was a good start but the moon I'm aiming for needs to be brighter on the right side. Rendering the lines like this will look really flat.
Weighting randomized points to the right side
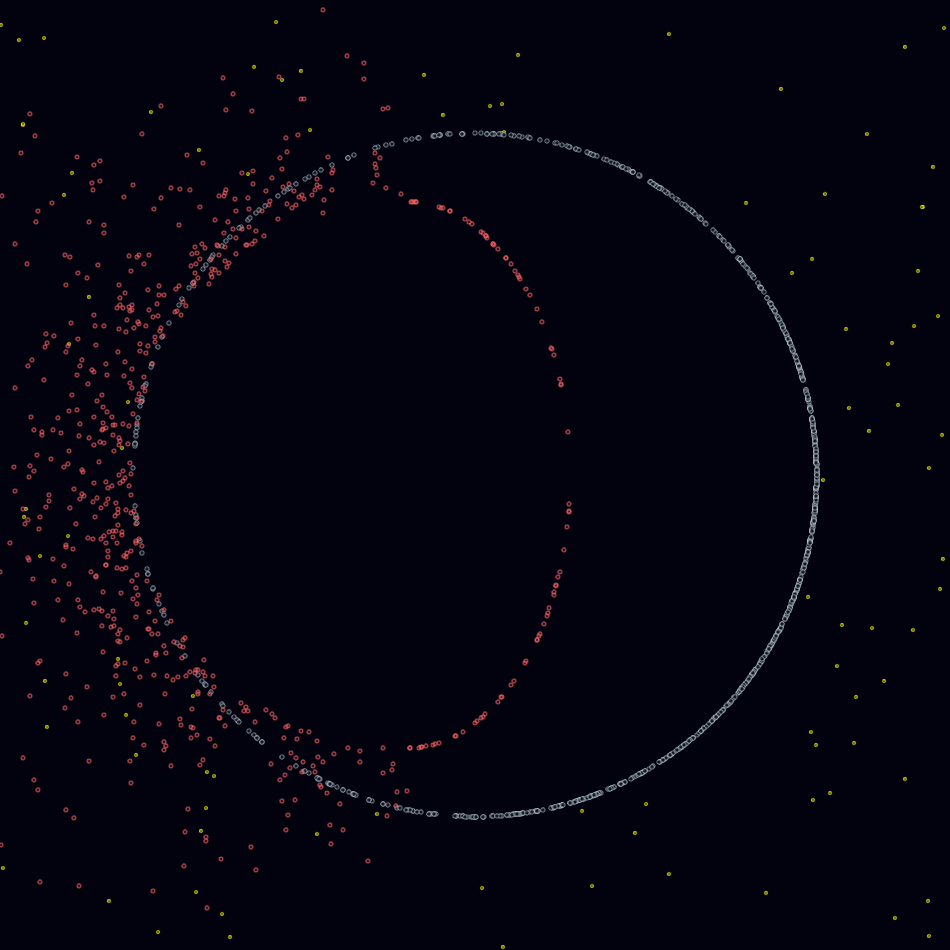
I calculated two points for each line.
For the first, I used a Gaussian distribution with mean PI / 12 and a standard deviation of PI / 4. This concentrates the first points of the lines to an area on the right side of the moon with a bit of an upwards tilt.
For the second, I experimented with different standard deviation values and ultimately landed on PI / 2. This was a trial and error process and decided by the visual appearance of the final renders. You can see the distribution of first and second points in the image below:
When rendering as lines, you can see how that intended brightening effect is starting to show up.
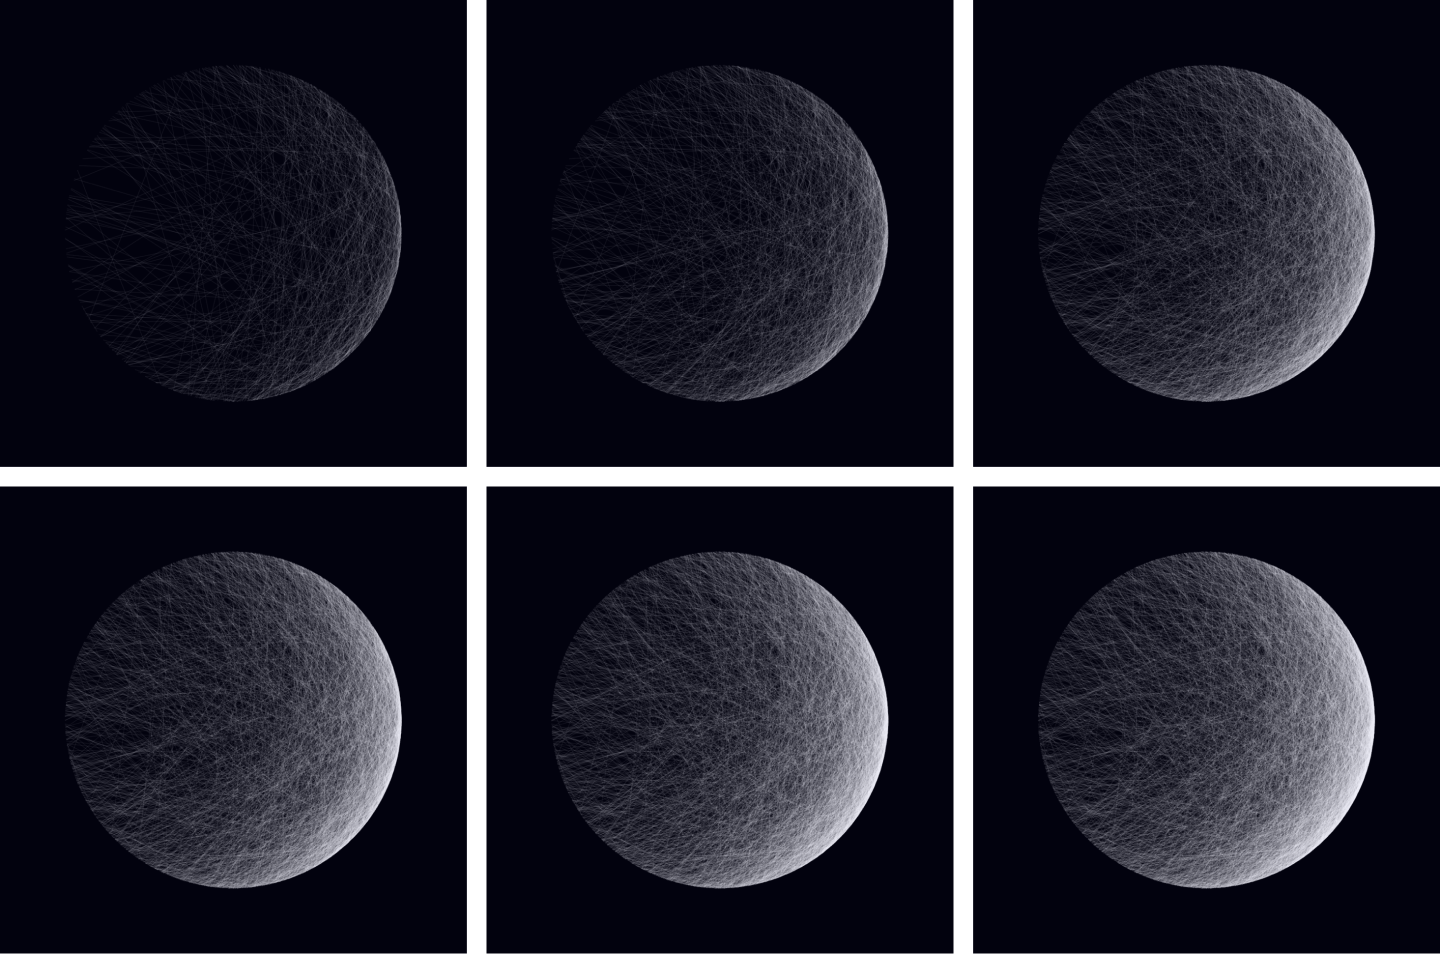
Next I experimented with different colours, opacity values, and stroke-widths for the lines as well as the absolute number of lines. The main goals were a detailed texture and smooth brightness gradient.
Shadow
The next step was figuring out how to make the shadowed side of the moon.
I tried a few different approaches that changed how the moon surface lines were calculated but didn't find anything I was happy with. The initial concept I worked with was preventing the moon surface lines from intersecting the area that I wanted to be in shadow. The texture of the moon didn't look as nice in these iterations though so I decided to try compositing a shadow onto the moon instead.
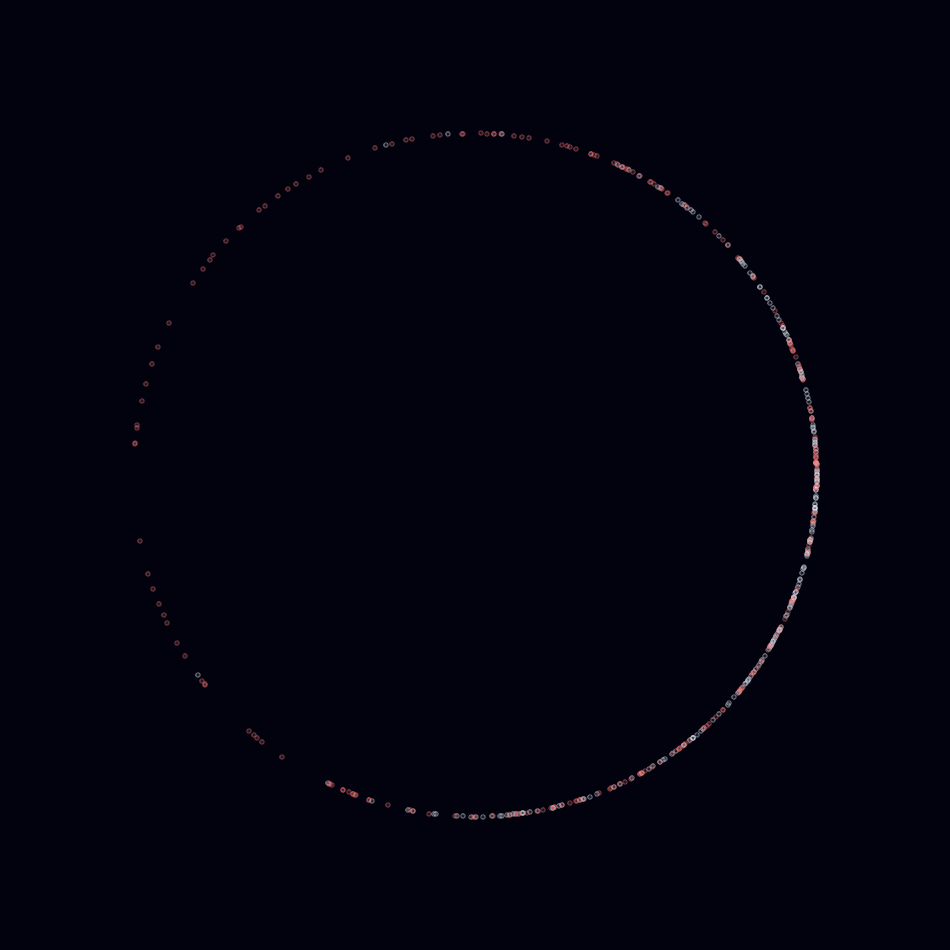
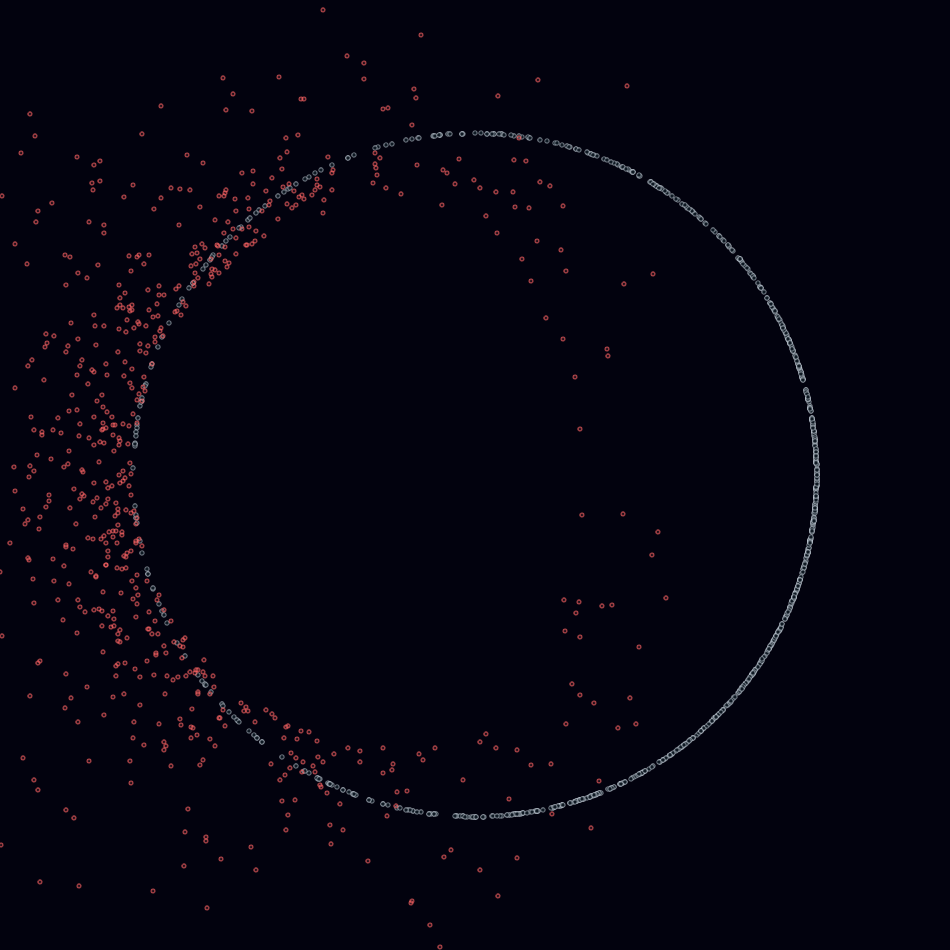
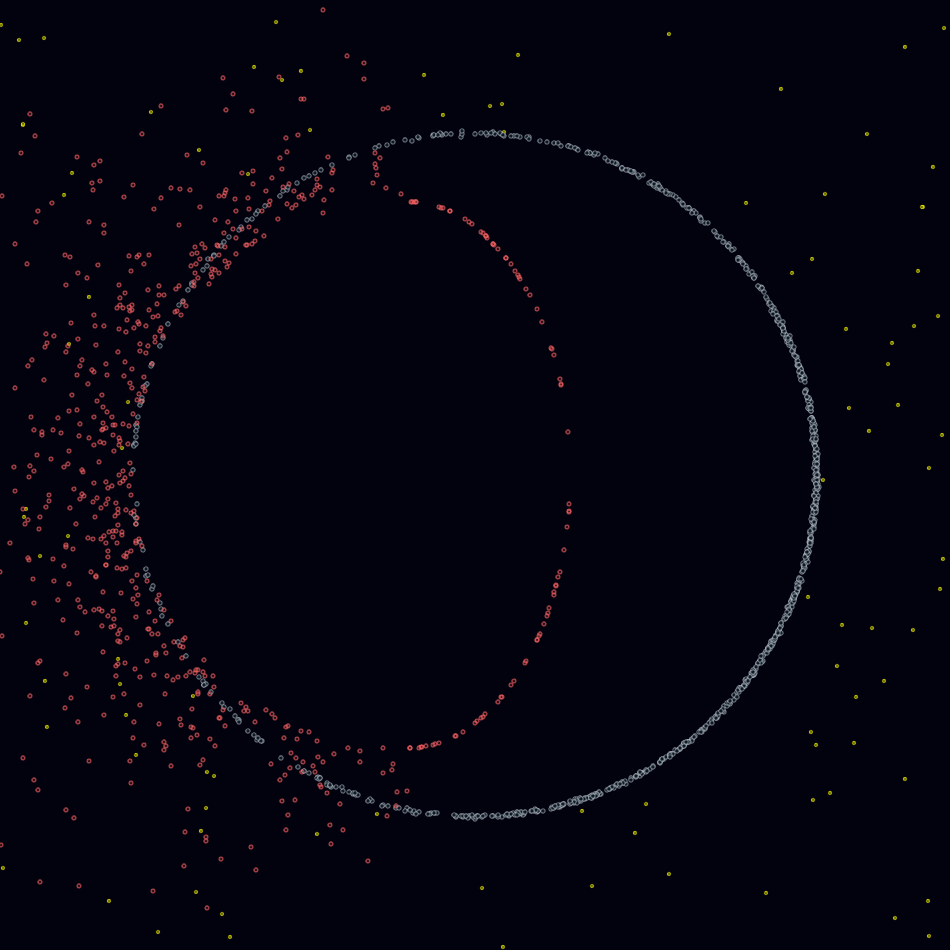
I used a similar strategy as the moon surface, I calculated points along a radius and used a Gaussian distribution to concentrate the points towards the left, the intended dark side of the moon.

You can probably see an issue already. The shadow area doesn't fully cover the left side of the moon surface! As you might imagine, it doesn't look right in the rendered line view.
I added a modifier effect to the position calculation of the points on the left half of the shadow in order to get better coverage. Basically, I increased the radius for that particular point by a randomized number. This spread the shadow points (shown in red) out beyond the edge of the moon surface radius (shown in white).

The edge of the right side of the shadow was also too clearly apparent so I decided to add a similar radius randomization effect. First though, the right side was too wide so I scaled it down with a function that calculates a position on a modified ellipse for a given angle around the shadow.

And then added the position randomization to the right side as well:
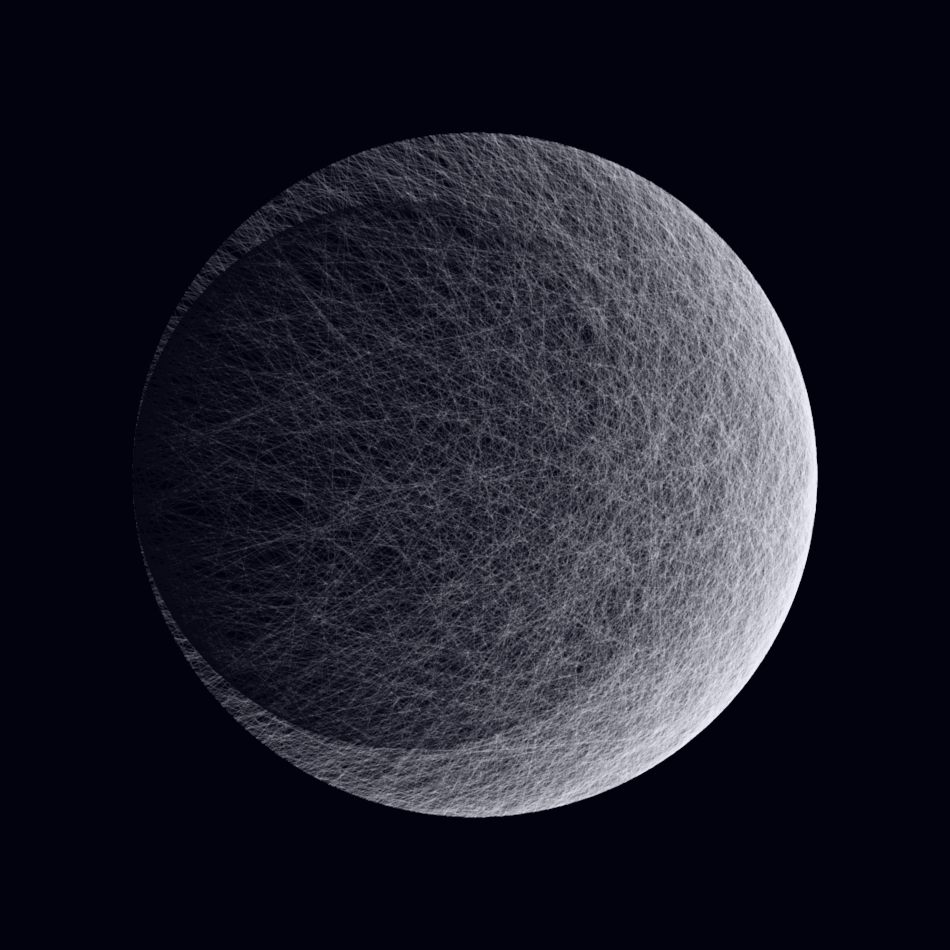
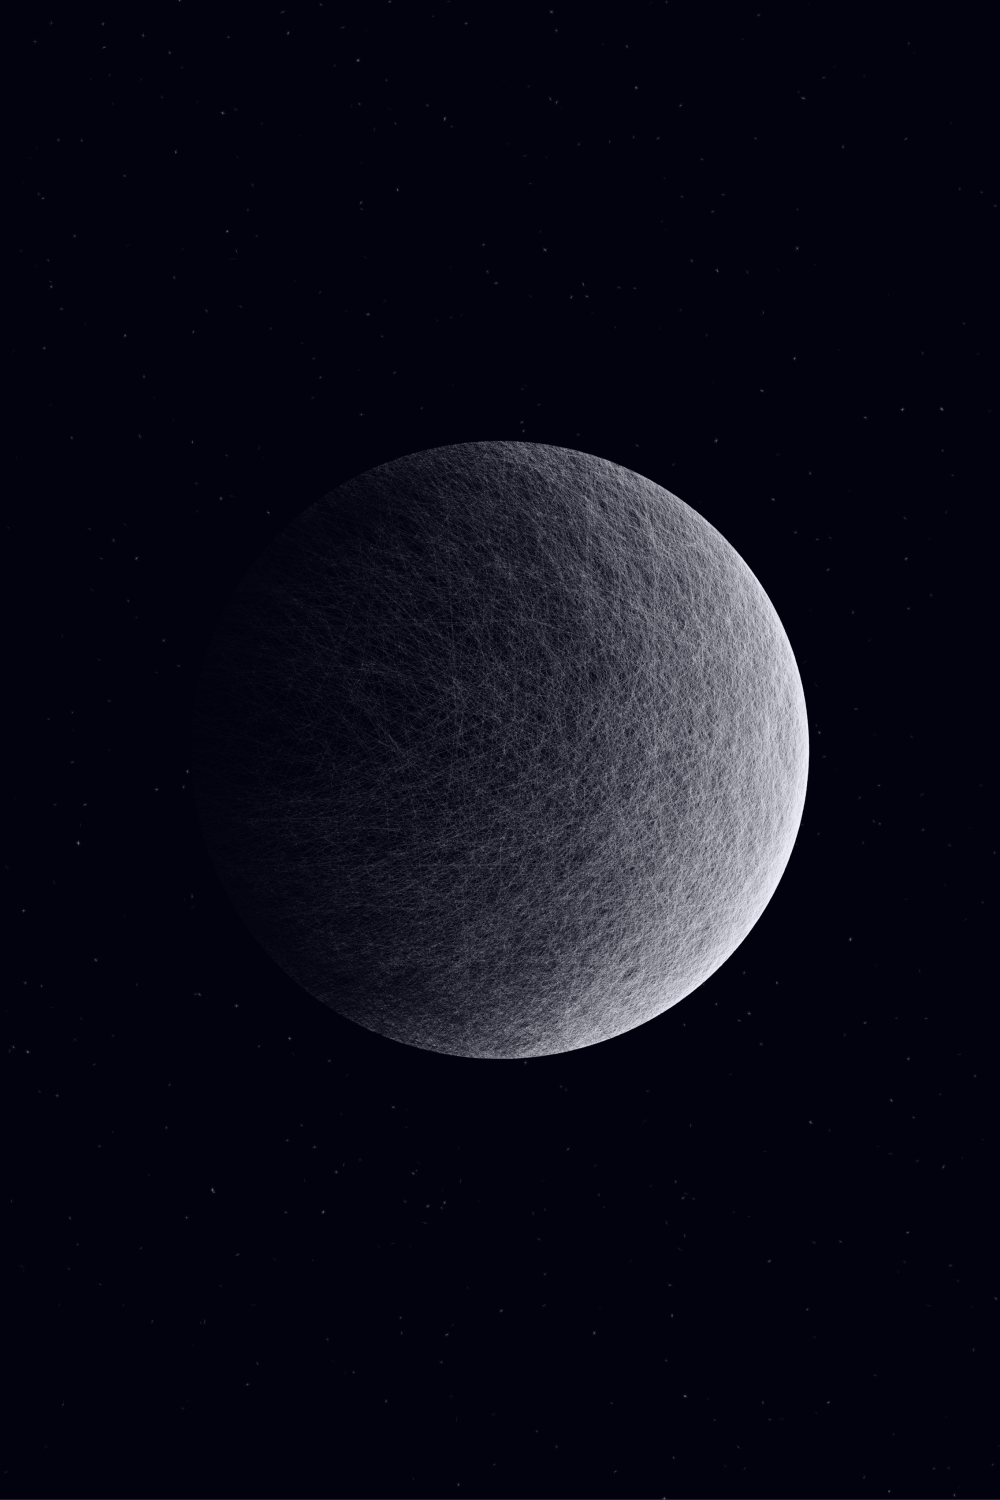
Results so far:
Pretty good! (If I do say so myself)
Twinkle twinkle little stars
This little moon needs some company. A multitude of stars in the background sounds like a good idea.
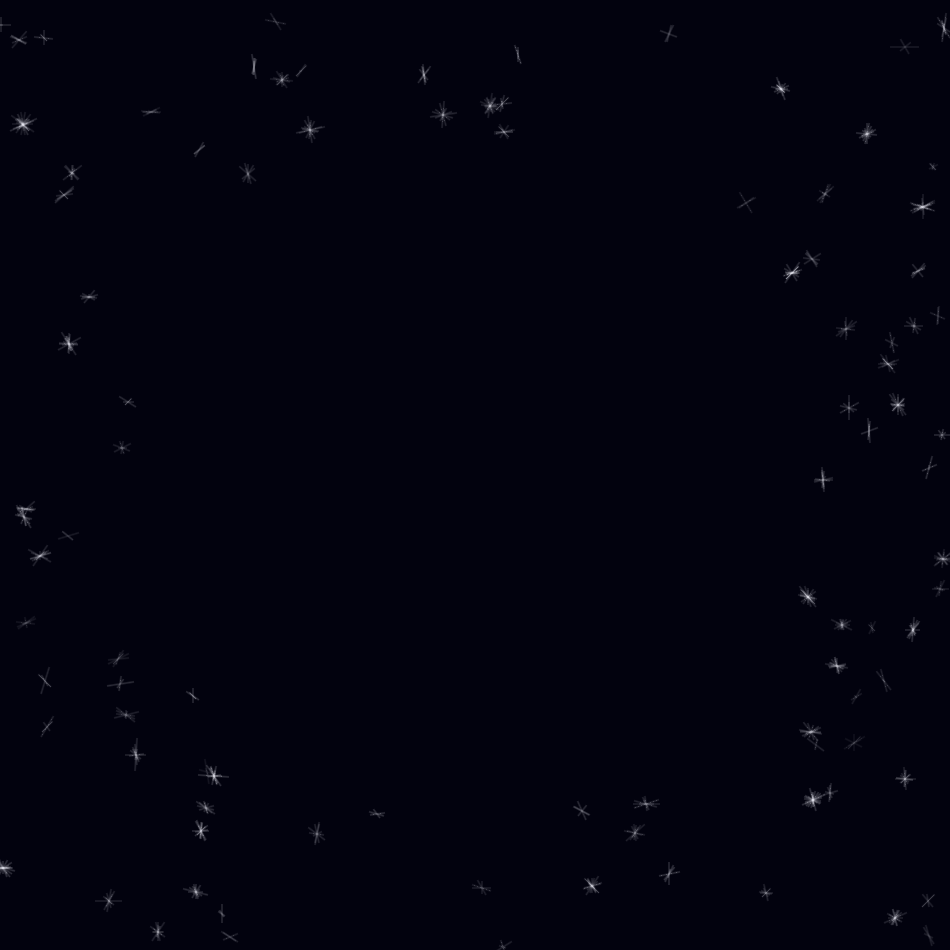
Star placement
I generated random points within a loop that included a bounds check. This bounds check ensured that we didn't have any star positions behind the moon. Another option would have been to use a mask on the moon area or to paint a circle with the background colour before drawing the moon, etc.
Star position results (shown in yellow):
Working out the rendering for the stars was a fun process. My personal impression of the stars in typical astro-photography shots is a glow and some light spikes. The light spikes certainly fit within the theme of this project so I started there.
Light spikes as lines
I wanted there to be visual variance so I broke down some attributes for the spikes:
- Angle
- Mean number of lines
- Deviation for number of lines
- Mean length for lines
- Deviation for line length
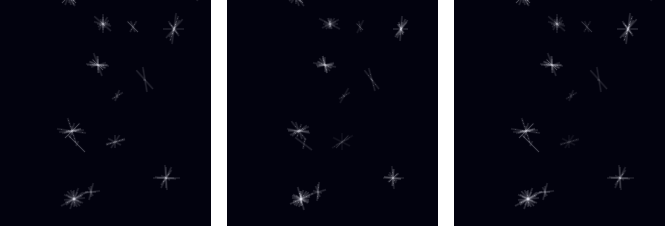
I wrote a function that would return a star as a set of lines, each with their randomized number of lines and lengths. I rendered them with a single semi-transparent, white-blue colour as a line centred around the origin point, drawn at the calculated angle.
This turned out well but I also saw more opportunities for tweaking the visuals. The first was introducing some randomization to the opacity of the star lines. Secondly, I added an X and Y translation property to the star lines and randomized this as well. These two updates gave each star more variance and added to the overall texture of them. The latter in particular rounded out the centre of the stars which accentuated the glow effect I mentioned at the start of this section.
The visual effect I'm reproducing here is actually a photography artifact called a "Diffraction spike". From wikipedia:
Diffraction spikes are lines radiating from bright light sources, causing what is known as the starburst effect[1] or sunstars[2] in photographs and in vision. They are artifacts caused by light diffracting around the support vanes of the secondary mirror in reflecting telescopes, or edges of non-circular camera apertures, and around eyelashes and eyelids in the eye.
This part was a bit tough, to be honest. Tough in that I was torn in which direction to take the piece. I liked the idea of replicating the artifacts in a technically accurate way but I also liked the visual appearance of the randomized angles. In the end, I went with the latter.
One last tweak!
I decided to add positional noise to the points generated for the moon surface. It gives a sense of surface discontinuity to the moon vs an exact circular edge.
To compare, here's a shot with no position variance on the left and a slight variance on the right:

Tools
I originally wrote this in Processing. It is a great tool but the IDE unfortunately leaves a lot to be desired. It also uses Java. That isn't necessarily a deal-breaker for me personally but I did miss many of the Kotlin niceties that I've gotten used to in recent years of Android programming.
I later made a happy discovery: the OPENRNDR project. It is an open-source framework, Kotlin-based and also makes use of IntelliJ. For an Android developer, OPENRNDER feels just like home. I was able to quickly re-write the project with very few issues.
Results
In the end, the moon surface is composed of some 7K lines, the shadow 16K lines, and ~5K lines for the stars. Here's a scaled down version of the final result:
I had this piece professionally printed and framed and, by far, my favourite aspect of it is the details that reveal themselves as you approach. To give you an idea, here's a cut-out from the full-size output:
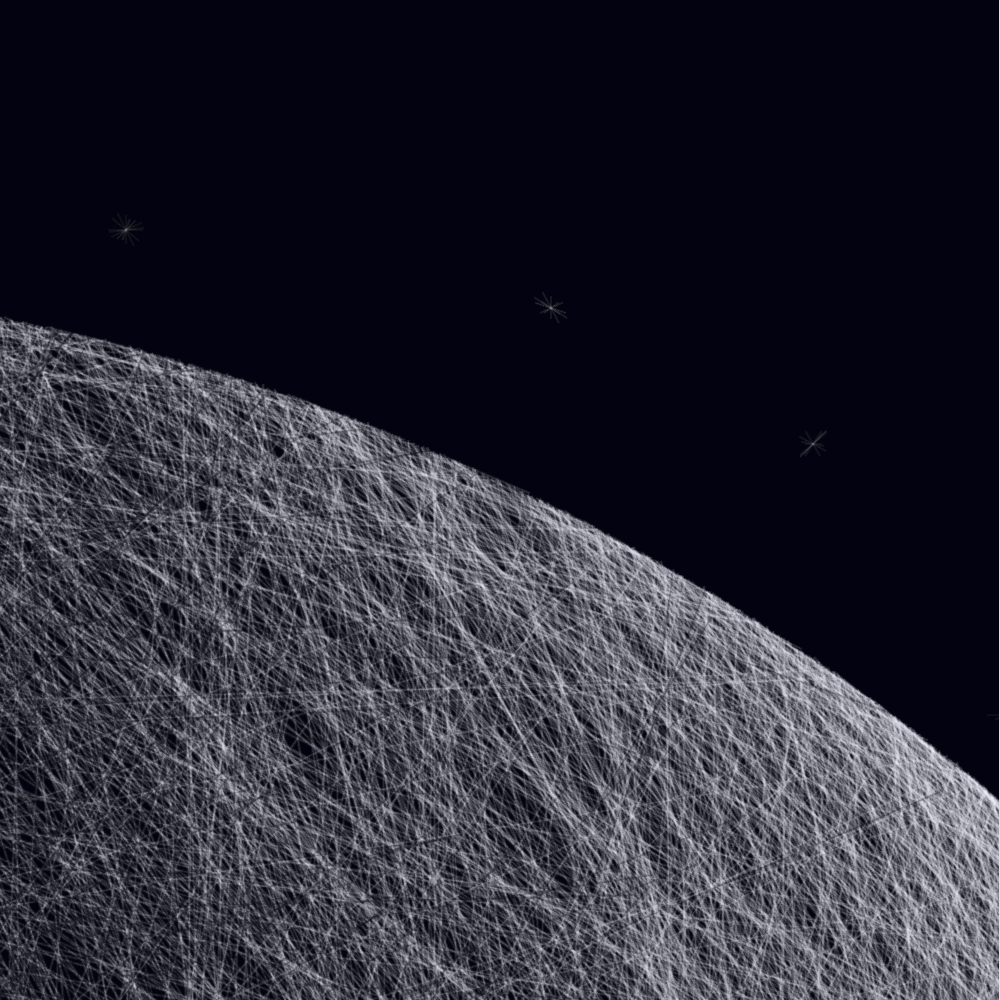
For anyone curious, the final png size for a 60x90cm print was ~35MB!
Thanks for reading!
Phew, this was a bit more ambitious than my previous write-ups! Please feel free to reach out if you have any questions.